What is the Peec AI Data Studio connector?
The Peec AI Data Studio community connector lets you import your AI search visibility data directly into Google Data Studio. You can then create custom dashboards and reports using your brand performance data from AI search engines like ChatGPT, Perplexity, and Gemini. Data Studio is Google’s free data visualization tool that helps you turn your data into informative, easy-to-read, and shareable dashboards and reports.How this helps
- Real-time data access: Connect directly to your Peec AI project for up-to-date visibility metrics.
- Custom visualizations: Create charts, graphs, and tables that match your reporting needs.
- Team collaboration: Share dashboards with stakeholders and team members.
How to set up the connector
Before you begin, ensure you have:- A Peec AI account with access to at least one project
- A Google account with access to Data Studio
Create the data source using the Peec connector
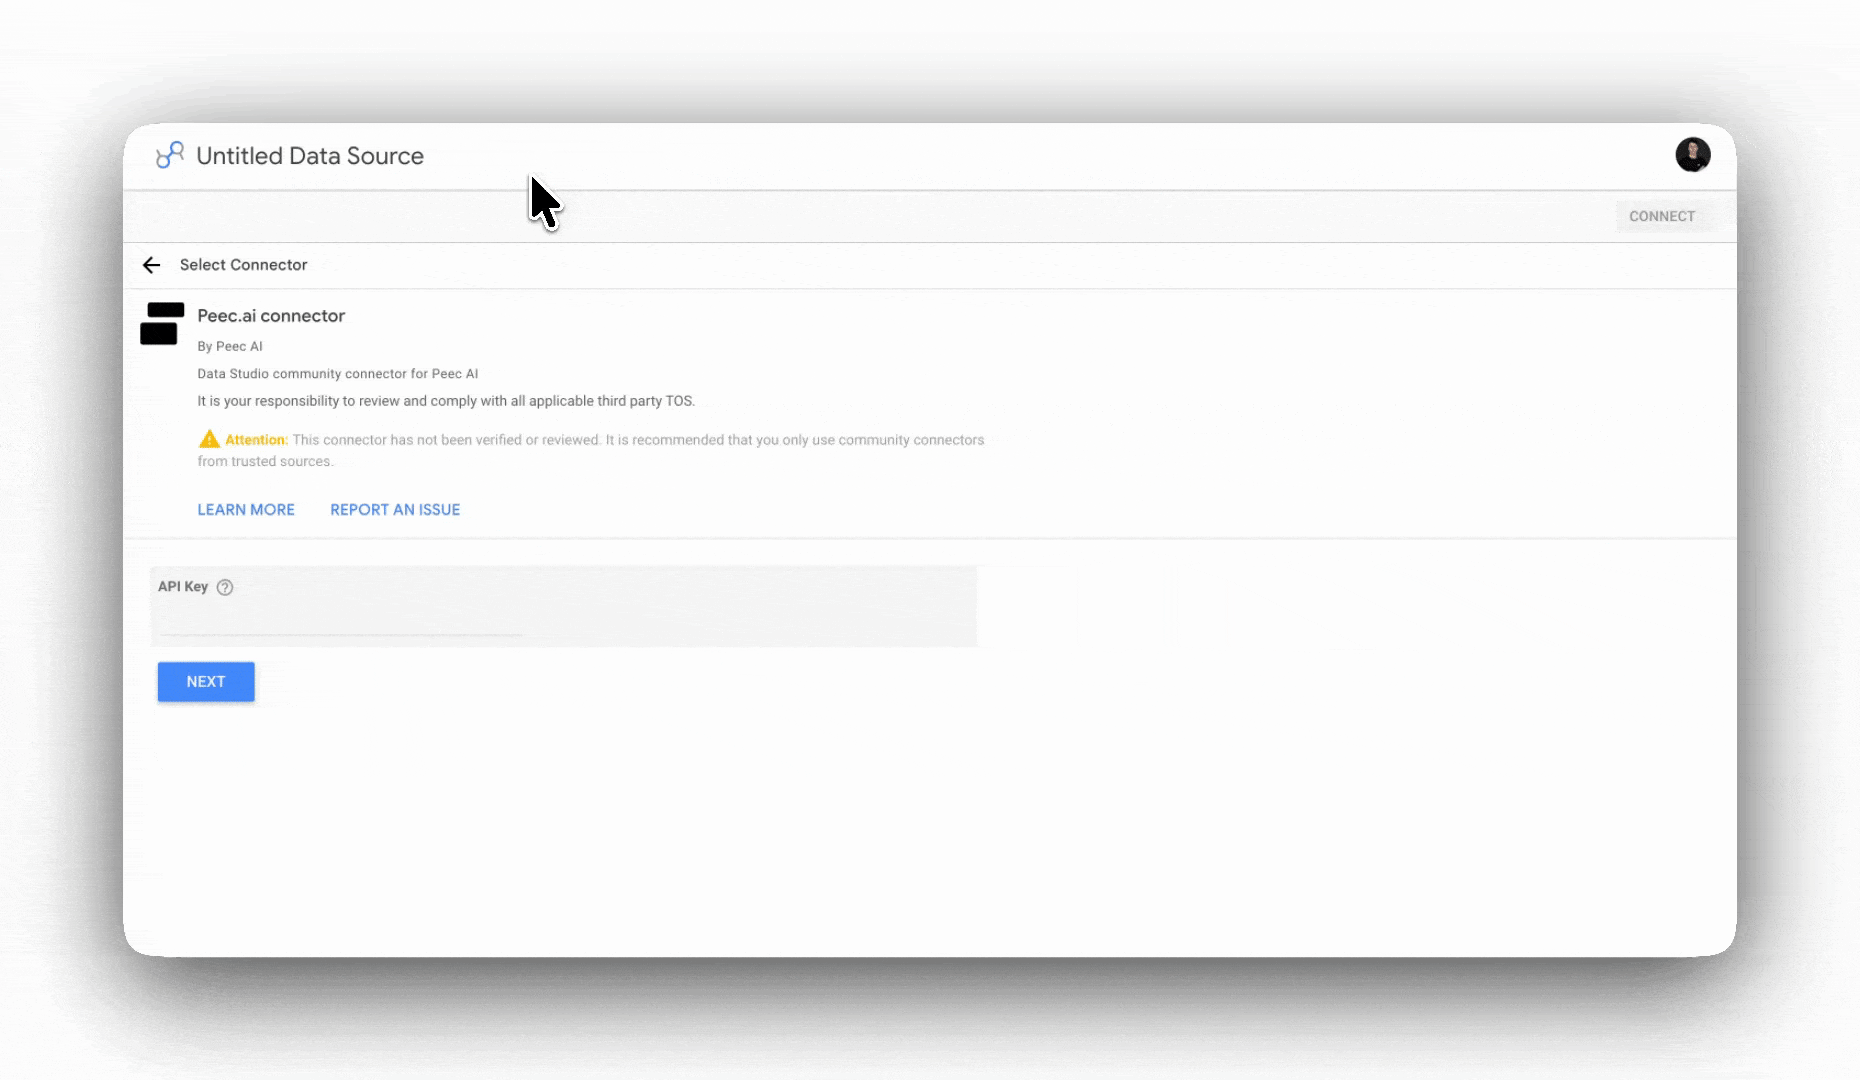
- Use this link to access Peec AI connector (make sure you’re signed in with your Google account).
- Create an API key in the Peec dashboard under “API Keys”
- When creating the key, select Scope: Project
- Give the key a name (e.g., “Data Studio Key”)
- Enter the API key in the empty field placeholder and click on Next, and then Connect
- Once it loads, click on Create Report and then Add to report
The Data Studio connector is available only to users with a valid Peec API Key in their account.
If you previously had a connection with Data Studio, you can simply follow the same steps, and once the data source is added, you can switch it in the report.
Available data fields
The Peec AI connector provides the following data fields:Dimensions
| Name | Display Name | Description |
|---|---|---|
| brand | Brand | The brands that you have in Peec |
| country_code | Country Code | The country code (two letter ISO code) |
| date | Date | The date (year month and day) as an integer |
| model | Model | The AI models that you have in Peec |
| model_channel_id | Model Channel | The model channel (e.g. ChatGPT UI, OpenAI API) used to generate the chats |
| prompt | Prompt | The prompt text used to generate the chats that you have in Peec |
| source_domain | Domain | The domain of the source URL |
| source_domain_classification | Domain Classification | The classification of the source domain |
| source_url | URL | The source URL of the sources found in the chats |
| source_url_classification | URL Classification | The classification of the source URL |
| tag | Tag | The tags you have created for the project in Peec |
| topic | Topic | The topics you have created for the project in Peec |
| workspace | Project | The project that the data belongs to |
Metrics
| Name | Display Name | Description |
|---|---|---|
| citation | Citation | The number of times a source URL is cited in the chats |
| retrieval | Retrieval | The number of unique chats where a source URL was retrieved |
| retrieval_percentage | Retrieval Percentage | The percentage of total chats where a source URL was retrieved |
| visibility | Visibility | The number of chats where a brand was mentioned at least once |
| sentiment | Sentiment | The sentiment of a brand in chats |
| position | Position | The position of a brand in chats |
| usage | Usage | The number of times a source URL is used in chats |
| sov | Share of Voice | The percentage of total mentions that belong to a brand |
Creating your first report
Step 1: Create a new report
- After configuring your data source, click CREATE REPORT.
- Looker Studio will open the report editor with your Peec AI data source connected.
Step 2: Add visualizations
Looker Studio offers a wide range of charts and tables to fit your needs. Have a look at the Types of Charts in Looker Studio for more options.Step 3: Apply filters and controls
Add interactive controls to make your reports dynamic.Getting help
If you encounter issues not covered here: Contact support: Email support@peec.ai with:- Description of the issue
- Screenshots if applicable