

Server URL
All platforms use the same URL:Authentication options
The server accepts two auth methods. Pick based on your client.- OAuth 2.0 (default for most clients). The first connection redirects you to Peec AI to sign in and approve access. Your session persists across conversations. Use for Claude Desktop, Claude Web, Cursor, VS Code, Windsurf, and any other client that walks through an OAuth consent screen.
- Personal Access Token (PAT). A long-lived bearer token tied to your Peec user. Use for clients that don’t support OAuth, headless setups, CI, or when you want to keep the token in your own secrets manager.
Create a Personal Access Token
1
Open API Keys
Sign in to app.peec.ai and go to API Keys in the sidebar.
2
Create a token
In the Personal Access Tokens section click Create token. Give it a name (e.g.
Claude Desktop, Cursor laptop) and pick an expiration: Never, 30 days, 60 days, or 90 days.3
Copy the token
Copy the token immediately. It’s shown only once. Treat it like a password — anyone with it can act as you in Peec via MCP.
Claude Desktop and Web (claude.ai)
1
Open settings
Open Claude Desktop and go to Settings or **Customize **(gear icon), then Connectors.
2
Browse connector
Search for and click on the Peec AI connector and install it
3
Authorize
Click Connect. You’ll be redirected to Peec AI to sign in. Once authorized, return to the Claude Desktop.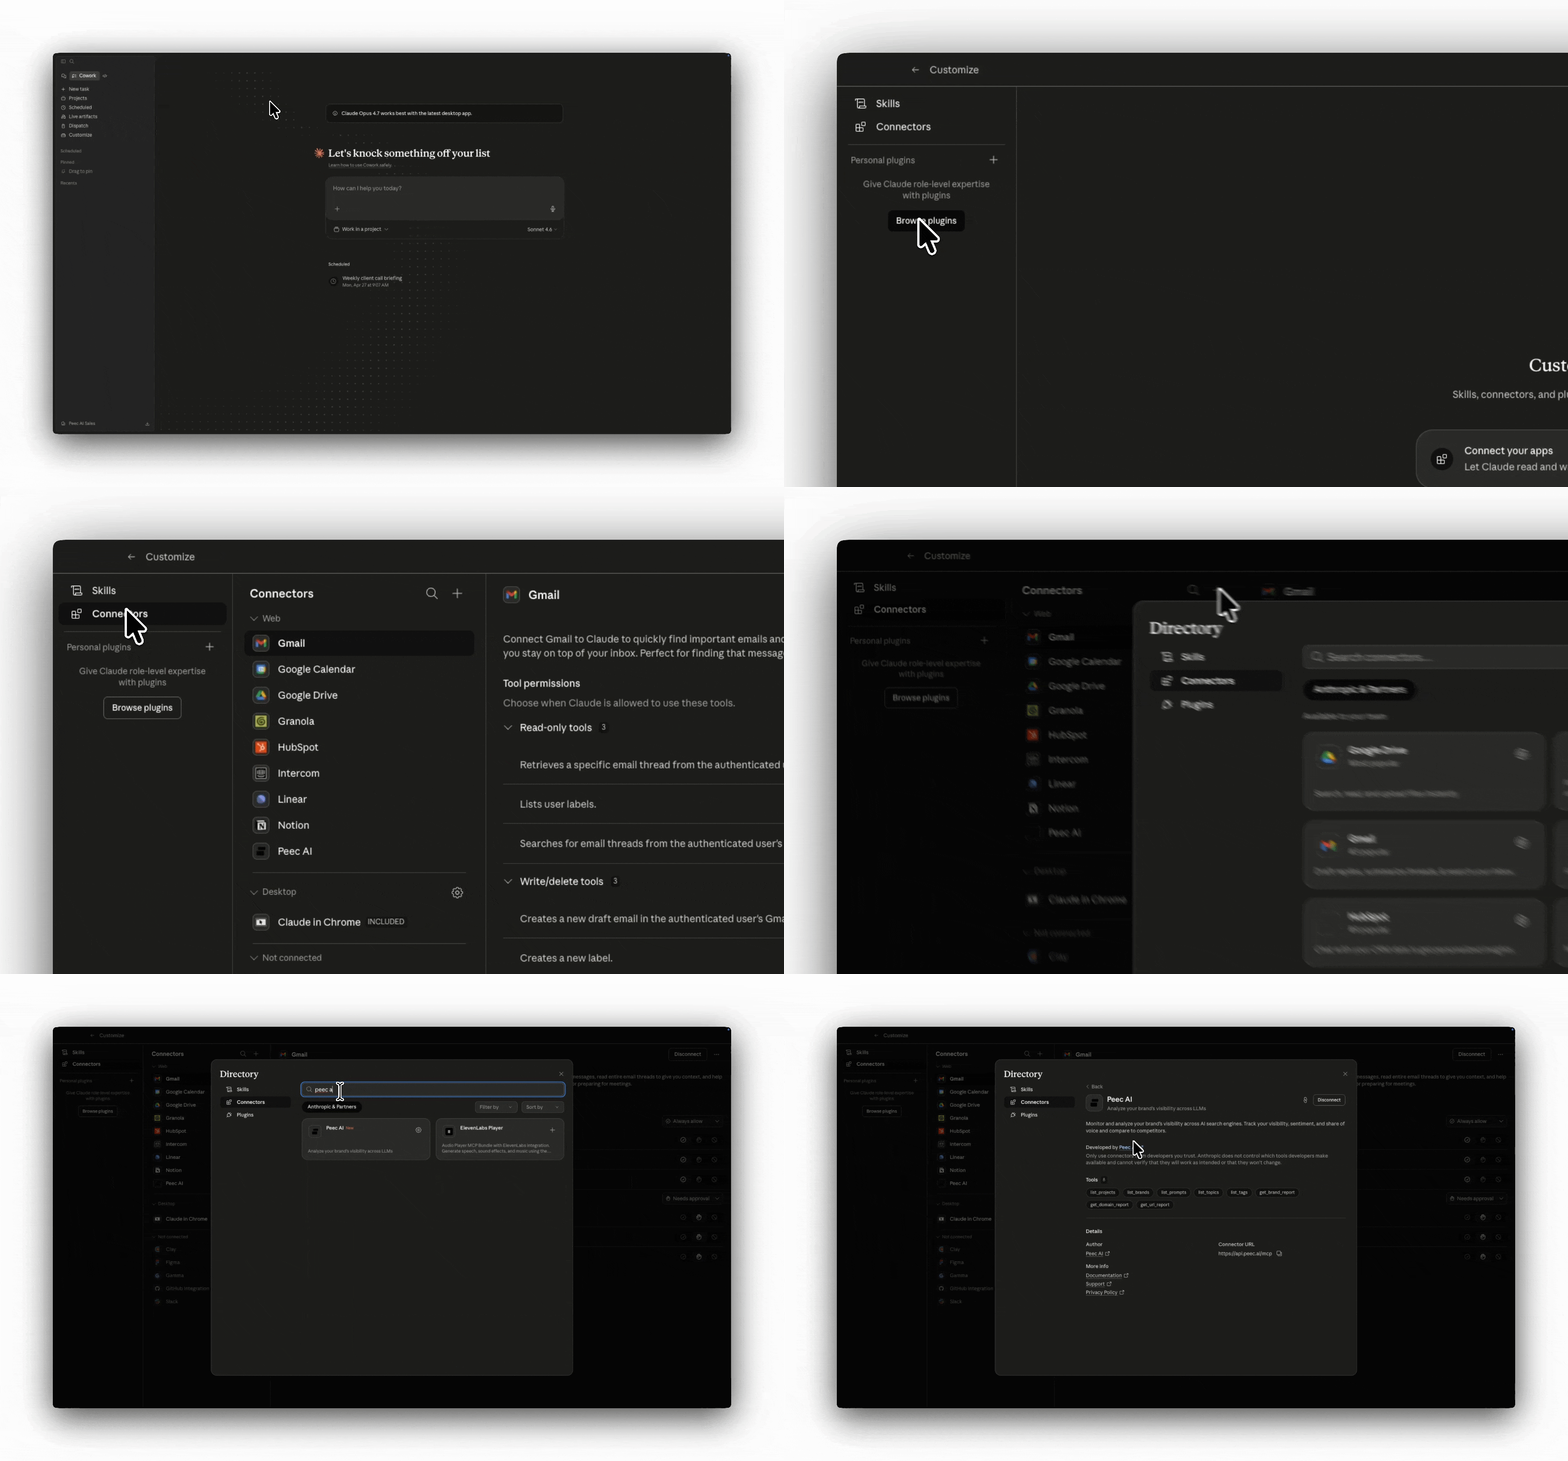
Please note that only workspace Admins in Claude can add the connector. If you are not able to, you might want to check with your admin
Claude Code (CLI)
OAuth (default):ChatGPT
Peec AI is available in the ChatGPT plugin directory, so there’s no server URL to enter and no developer mode required.1
Open the plugin directory
In ChatGPT, open Plugins from the sidebar, or go to chatgpt.com/plugins. Some accounts show this as Settings → Apps & connectors.
2
Install Peec AI
Search for Peec AI and click Install.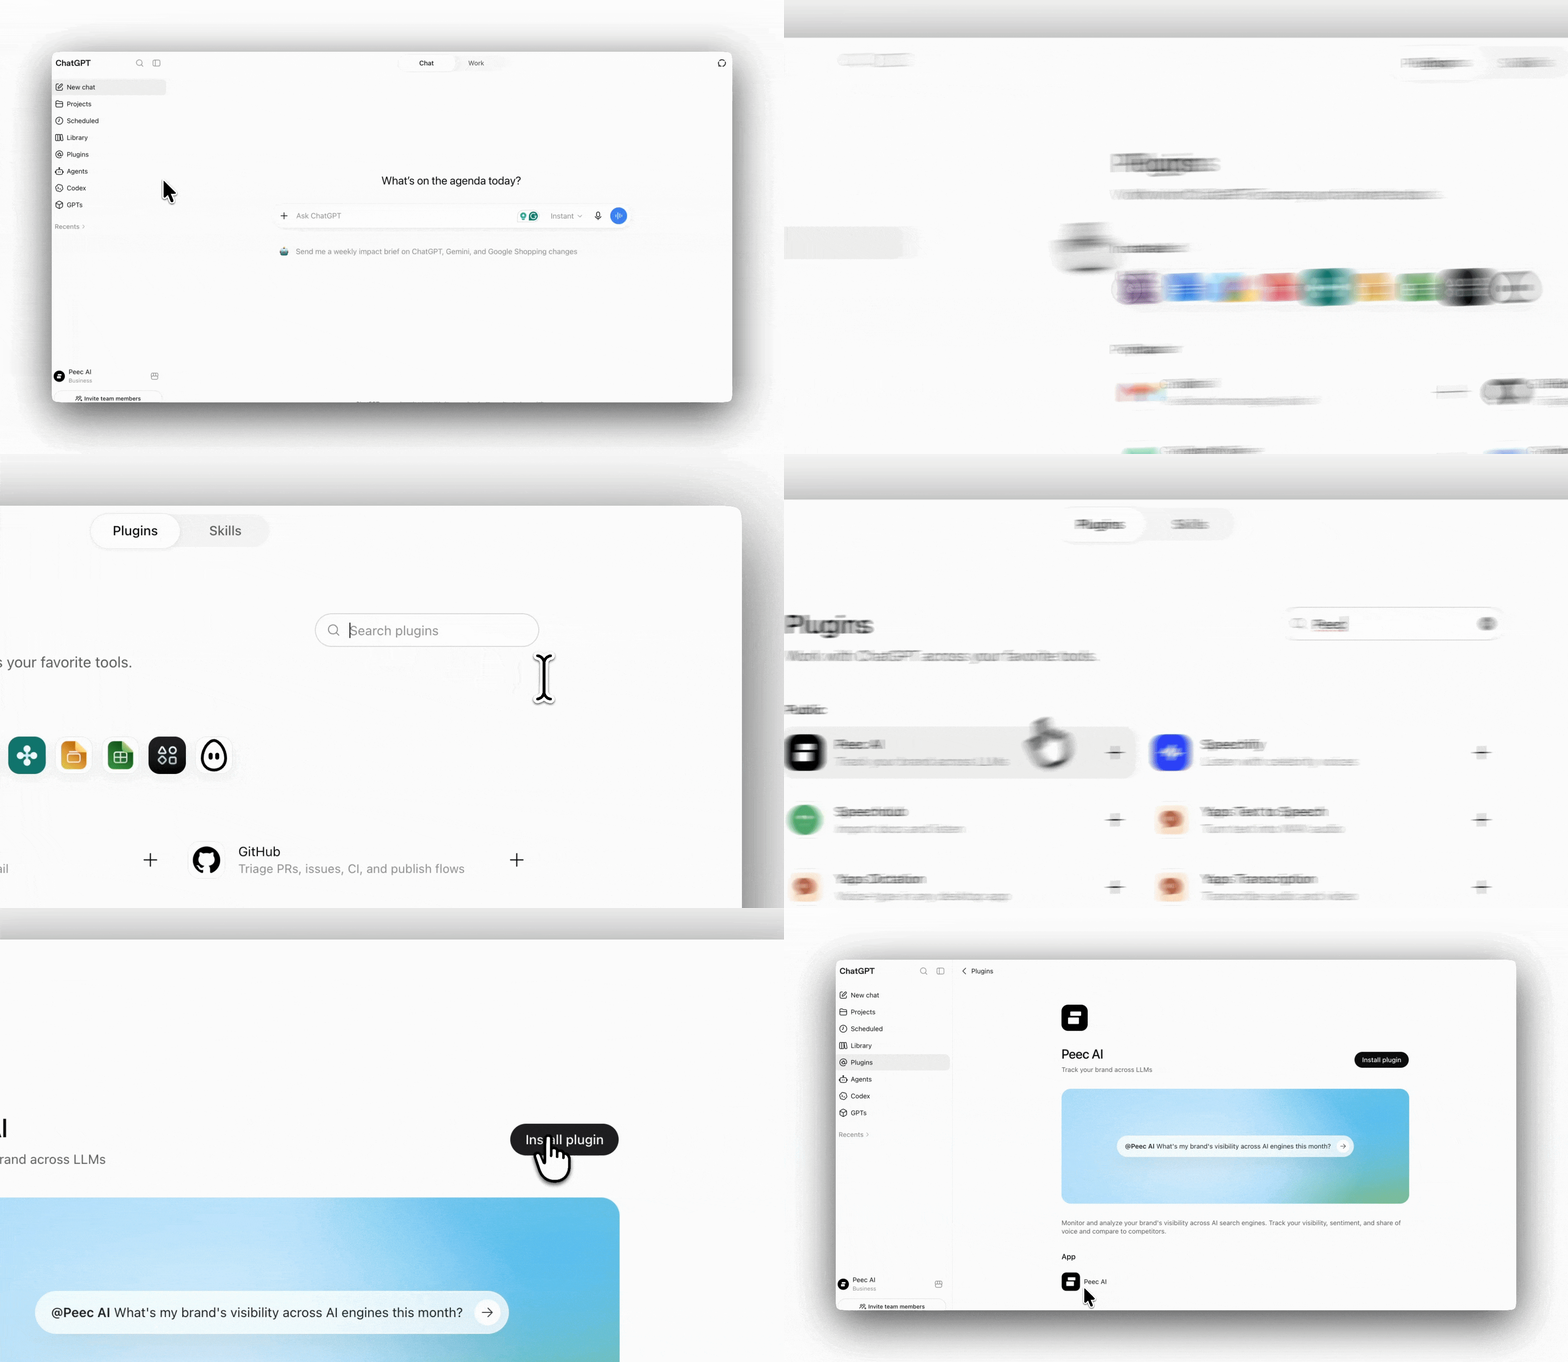
3
Authorize
Click Connect. You’ll be redirected to Peec AI to sign in and approve access. Once authorized, return to ChatGPT.
On Enterprise and Edu workspaces, an admin may control plugin access by role. If Peec AI doesn’t appear in the directory, ask your workspace admin to check the installation policy under Workspace settings → Plugins.
4
Use it in a chat
Start a new conversation and mention the plugin with
@Peec AI, or select it from Plugins. Installed plugins are also available in Codex.Codex (CLI and IDE)
OAuth (default). Add the server to~/.codex/config.toml:
codex mcp login peec-ai to authorize. Use /mcp in the Codex TUI to confirm the connection.
With a Personal Access Token:
Cursor
1
Open MCP settings
Open Cursor Settings, then go to Tools & Integrations, then MCP.
2
Add server
Click Add Custom MCP and enter the server URL:Select Streamable HTTP as the transport type. To use a PAT instead of OAuth, add an
Authorization: Bearer YOUR_PEEC_PAT header on the connection.3
Authorize
Without a PAT, you’ll be prompted to sign in via Peec AI when you first use the server.
VS Code (GitHub Copilot)
Add a.vscode/mcp.json file to your workspace (or open the user-level config via the MCP: Open User Configuration command):
Windsurf
1
Open MCP settings
Open Windsurf Settings, then go to MCP.
2
Add server
Click Add Server and enter the server URL:
3
Authorize
You’ll be prompted to sign in via Peec AI when you first use the server.
Other platforms
The Peec AI MCP Server uses Streamable HTTP transport and works with any AI tool that supports the MCP standard. Use the server URLhttps://api.peec.ai/mcp and configure your tool’s MCP settings accordingly. If the client doesn’t support OAuth, attach a Personal Access Token as an Authorization: Bearer <token> header.
Verify your connection
After setup, try asking your AI assistant:“List my Peec AI projects”You should see a list of projects your account has access to. If that works, you’re all set. From here:
- Run a built-in prompt (slash command) for a ready-made analysis like the weekly visibility pulse or competitor radar.
- Or browse the use cases for free-form question ideas.
Troubleshooting
“Authorization failed” or “Unauthorized”- Check that you signed in with the correct Peec AI account
- Try removing and re-adding the integration
- Clear your browser cookies for
api.peec.aiand try again - Using a PAT? Confirm the token isn’t expired or revoked in API Keys → Personal Access Tokens, and that the
Authorization: Bearer ...header is being sent.
- Make sure your account has access to at least one project in the Peec AI dashboard
- Check your internet connection
- Make sure the URL is exactly
https://api.peec.ai/mcp